Self-Hosting an Obsidian Relay Server
TL;DR
- Determine the URL for your self-hosted server.
- Download and install the Relay Server docker image on a Synology NAS.
- Install the Relay plugin in Obsidian.
- Create a relay server.
- Start sharing folders!
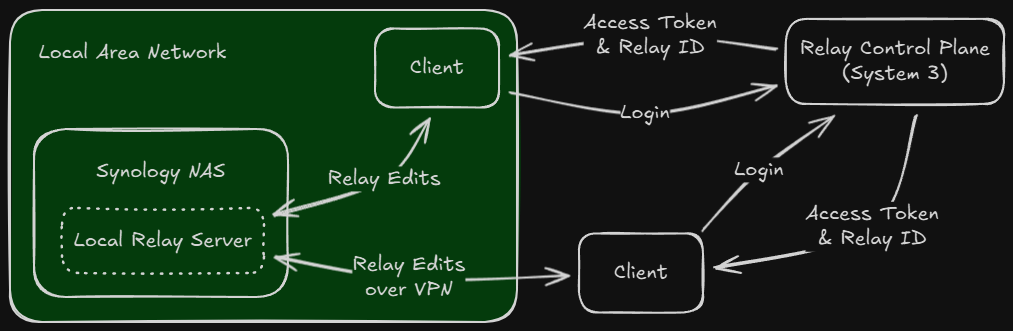
In simplified terms, this is what the final solution looks like:
Why do it?
One of key tenets of Obsidian is that "your thoughts and ideas belong to you and deserve complete privacy." Consequently, your data is stored locally, is inaccessible to the Obsidian team, and is end-to-end encrypted when synchronized over public networks. One drawback to this approach is that collaboration with others is hard. The challenge of local-first software is to keep your data close, but not lock it into a single device, allow use of the data without a network, yet allow for seamless collaboration with others, and ensure ownership and control of your own data with security and privacy designed in by default. Obsidian ticks almost all of these boxes, but does not by itself allow for easy collaboration.
Wanderloots created a great video about an Obsidian plugin that can close this gap and allow effective collaboration within Obsidian without compromising its core principles. The Relay for Obsidian plugin achieves local-first collaboration in Obsidian by allowing users to selectively share folders within their vault with others. The Relay service, based on the open-source Yjs project, uses "conflict-free replicated data types" to implement real-time multi-user editing that is very similar to what you see in fully cloud-based solutions like Google Docs. According to System 3, the developers of Relay, this is "true multiplayer for Obsidian".
System 3 acknowledges that sending your data through their relay server is not yet end-to-end encrypted, and you therefore may not want to use their service to relay sensitive information. That said, the relay server code is open-source and can be self-hosted. If you set up your own relay server, then System 3 only handles the authentication of users. Your data will relay directly between your users and your own relay server. I decided to try this out by installing the relay server software in a docker container on a Synology NAS on my local area network. This allows free collaboration between users on my network (including users connecting over my VPN) without granting System 3 any access to my network or data.
What follows is an explanation of how I put this together.
Detailed Instructions
1. Determine the URL for your self-hosted server
- Get the host name of your Synology NAS on your LAN (e.g.,
mynas.local).- Run
ping mynas.localto confirm that your DNS can resolve this host name. - If ping fails, you may need to add
mynas.localto the known hosts on your DNS server. - If you can't get
mynas.localto work, you could use the IP address of your NAS (e.g.,192.168.1.5).
- Run
- If your server's host name is
mynas.local, then your server's URL should behttp://mynas.local:8080
2. Install the Relay Server software on your Synology NAS
- Connect to Synology DSM in your web browser.
- Open Package Center and install Container Manager.
- Open File Station. You should see a top-level shared folder called "docker". Within this folder create another folder called "relay", and within that folder create another folder called "data". You should now have this chain of folders:
/docker/relay/data. In a later step below, this will be mapped to the data directory inside the docker container so that the relay server's file storage is outside the docker container. - Use SSH to connect to the command line of your Synology NAS.
- Run this command:
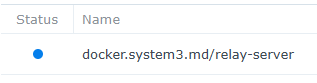
sudo docker pull docker.system3.md/relay-server. - Return to Synology DSM in your browser and open Container Manager.
- You should now see the relay server listed on the Image tab.
- Switch to the Container tab and click the
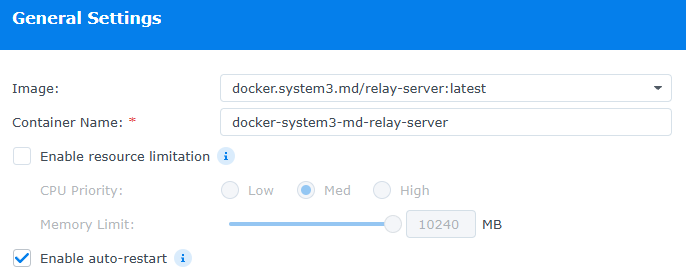
Createbutton. - In the General Settings screen, select your relay server image from the dropdown, enable auto-restart, then click the
Nextbutton.
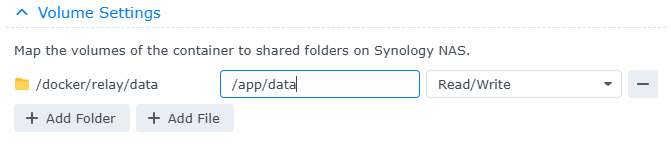
- In the Advanced Settings screen, under Volume Settings, click
Add Folder, select/docker/relay/data, then type/app/datain the next box, and pickRead/Writefrom the drop-down. This will map Relay's data directory to the shared folder you created above.
- Next add your server's URL as an environment variable.

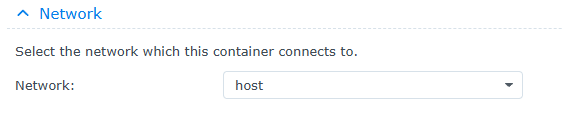
- Further down in Advanced Settings, select
hostas the network, then click Next.
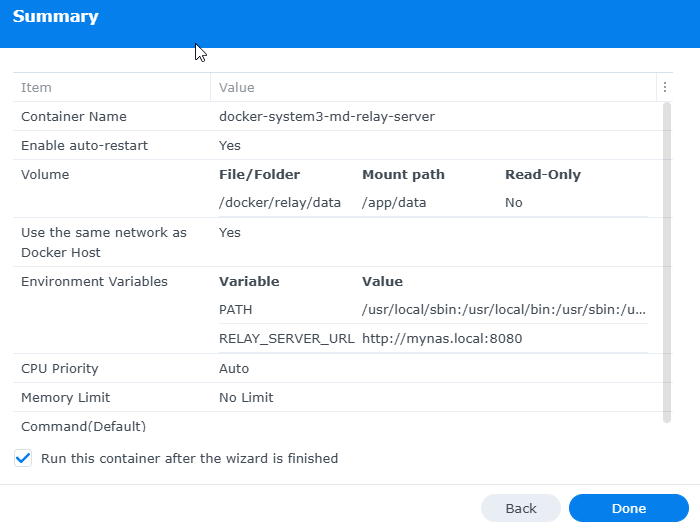
- Confirm your settings, then click Done to start your relay server!
3. Install the Relay plugin for Obsidian
- Browse the Community Plugins in Obsidian for Relay by System 3 and click Install and Enable.
- The first time you click on Options you will be asked to login using a Github, Google, or Microsoft account. System 3 only uses this for authentication.
4. Create a relay on your self-hosted server
- Exit the Settings page and hit Ctrl+P (Cmd+P on a Mac) to open the Command Palette.
- Select
Relay: Register self-hosted Relay Server. - Your name should appear in the
Ownerfield. Enter your server's URL (from above) into theRelay Server URLfield and click theCreate Relay Serverbutton. - The Options dialog for Relay will open to the configuration page for your new relay server, which you can now rename to something more memorable.
- Important Note: If you add relay servers using the
Createbutton in the Relay plugin settings in Obsidian, these new relays will by default use the System 3 relay server and not your local server. To use your self-hosted server for additional relays, just run theRegister self-hosted Relay Servercommand again. Your server URL should already appear in the dialog; just select it and click theCreate Relay Serverbutton.
5. Start sharing folders privately
- Open the settings for the Relay plugin in Obsidian and click on the Options cog for your relay server.
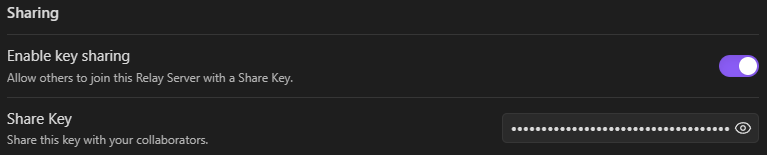
- Click on the
Share a folderbutton to select one or more folders to share. - To share with others, copy the Share Key and provide it to your collaborators.
Thanks to Daniel at System 3 for helping me get this up and running. For more information on the Relay plugin and the Relay Server, visit System 3 and their GitHub repositories: